laravel5.5+dingo+JWT开发后台API

dingo api 中文文档: https://www.bookstack.cn/read/dingo-api-wiki-zh/README.md
Laravel中使用JWT:https://laravel-china.org/articles/10885/full-use-of-jwt
辅助文章: https://www.jianshu.com/p/62b0c4d75e59

参考https://www.jianshu.com/p/62b0c4d75e59 这篇文章基本就能搭建出环境,我使用的版本跟他一样 “dingo/api”: “2.0.0-alpha1”,”tymon/jwt-auth”: “^1.0.0-rc.1”,不知道别的版本有啥大的区别,但是网上找的其他一些文章使用的是旧的版本,jwt封装的东西路径可能不一样,可能会保错,有些文档还说要手动添加Tymon\JWTAuth\Providers\LaravelServiceProvider::class和Dingo\Api\Provider\LaravelServiceProvider::class,其实新版本不需要。

1. composer.json引入包,执行composer update:

1
2
3
4
5
 "require": {
......
"dingo/api": "2.0.0-alpha1",
"tymon/jwt-auth": "^1.0.0-rc.1"
},

2. 执行下面两个语句自动生成dingo和jwt的配置文件:

1
2
php artisan vendor:publish --provider="Dingo\Api\Provider\LaravelServiceProvider"
//config文件夹中生成dingo配置文件---> api.php
1
2
php artisan vendor:publish --provider="Tymon\JWTAuth\Providers\LaravelServiceProvider"
//config文件夹中生成dingo配置文件---> jwt.php

3. 配置 .env

具体配置可参考 文档https://www.bookstack.cn/read/dingo-api-wiki-zh/Configuration.md ,我的配置是

1
2
3
4
5
API_STANDARDS_TREE=vnd
API_PREFIX=api
API_VERSION=v1
API_DEBUG=true
API_SUBTYPE=myapp

还需在命令行执行 php artisan jwt:secret,会在.env自动添加JWT_SECRET,其他若需要,可以到各种的配置文件中看,在.env添加即可

4. 关键处理

1
2
3
4
5
6
7
8
9
10
11
12
13
14
15
16
'defaults' => [
'guard' => 'web',
'passwords' => 'users',
],

'guards' => [
'web' => [
'driver' => 'session',
'provider' => 'users',
],

'api' => [
'driver' => 'jwt',
'provider' => 'users',
],
],

这里需要把api原本的driver => session 改为使用jwt机制,provider对应你要用的用户认证表,一般就是登录注册那张表

1
2
3
4
5
6
7
8
9
10
11
12
13
14
15
16
17
18
19
20
21
22
23
24
25
26
27
28
29
30
31
32
33
34
35
36
37
38
39
40
41
42
43
44
45
46
47
48
49
50
<?php

namespace App\Models;

use Tymon\JWTAuth\Contracts\JWTSubject;
use Illuminate\Notifications\Notifiable;
use Illuminate\Foundation\Auth\User as Authenticatable;

class User extends Authenticatable implements JWTSubject {
use Notifiable;

/**
* The attributes that are mass assignable.
*
* @var array
*/
protected $fillable = [
'name', 'email', 'password', 'unionid'
];

/**
* The attributes that should be hidden for arrays.
*
* @var array
*/
protected $hidden = [
'password', 'remember_token',
];


// Rest omitted for brevity

/**
* Get the identifier that will be stored in the subject claim of the JWT.
*
* @return mixed
*/
public function getJWTIdentifier() {
return $this->getKey();
}

/**
* Return a key value array, containing any custom claims to be added to the JWT.
*
* @return array
*/
public function getJWTCustomClaims() {
return [];
}
}

5. 设置控制器

考虑到可能后面需要开发不同版本api,所以在app/Http/Controller下建立了V1,V2目录,根据你自己的需求来,只要写好命名空间就ok
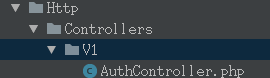
 avatar

1
2
3
4
5
6
7
8
9
10
11
12
13
14
15
16
17
18
19
20
21
22
23
24
25
26
27
28
29
30
31
32
33
34
35
36
37
38
39
40
41
42
43
44
45
46
47
48
49
50
51
52
53
54
55
56
57
58
59
60
61
62
63
64
65
66
67
68
69
70
71
72
73
74
75
76
77
78
79
80
81
82
83
84
85
86
87
88
89
90
91
92
93
94
95
96
97
98
99
100
101
102
103
104
105
106
107
108
109
110
111
112
113
114
115
116
117
118
119
120
121
122
123
124
125
126
127
128
129
130
131
132
133
134
135
136
137
138
139
140
141
142
143
<?php
/**
* Date: 17/10/12
* Time: 01:07
*/

namespace App\Http\Controllers\V1;

use App\Http\Controllers\Controller;
use Illuminate\Http\Request;
use Illuminate\Support\Facades\Auth;
use Validator;
use App\User;

class AuthController extends Controller
{

protected $guard = 'api';//设置使用guard为api选项验证,请查看config/auth.php的guards设置项,重要!

/**
* Create a new AuthController instance.
*
* @return void
*/
public function __construct()
{
$this->middleware('refresh', ['except' => ['login','register']]);
}

public function test(){
echo "test!!";
}

public function register(Request $request)
{

$rules = [
'name' => ['required'],
'email' => ['required'],
'password' => ['required', 'min:6', 'max:16'],
];

$payload = $request->only('name', 'email', 'password');
$validator = Validator::make($payload, $rules);

// 验证格式
if ($validator->fails()) {
return $this->response->array(['error' => $validator->errors()]);
}

// 创建用户
$result = User::create([
'name' => $payload['name'],
'email' => $payload['email'],
'password' => bcrypt($payload['password']),
]);

if ($result) {
return $this->response->array(['success' => '创建用户成功']);
} else {
return $this->response->array(['error' => '创建用户失败']);
}

}

/**
* Get a JWT token via given credentials.
*
* @param \Illuminate\Http\Request $request
*
* @return \Illuminate\Http\JsonResponse
*/
public function login(Request $request)
{
$credentials = $request->only('email', 'password');

if ($token = $this->guard()->attempt($credentials)) {
return $this->respondWithToken($token);
}

return $this->response->errorUnauthorized('登录失败');
}

/**
* Get the authenticated User
*
* @return \Illuminate\Http\JsonResponse
*/
public function me()
{
//return response()->json($this->guard()->user());
return $this->response->array($this->guard()->user());
}

/**
* Log the user out (Invalidate the token)
*
* @return \Illuminate\Http\JsonResponse
*/
public function logout()
{
$this->guard()->logout();

//return response()->json(['message' => 'Successfully logged out']);
return $this->response->array(['message' => '退出成功']);
}

/**
* Refresh a token.
*
* @return \Illuminate\Http\JsonResponse
*/
public function refresh()
{
return $this->respondWithToken($this->guard()->refresh());
}

/**
* Get the token array structure.
*
* @param string $token
*
* @return \Illuminate\Http\JsonResponse
*/
protected function respondWithToken($token)
{
return response()->json([
'access_token' => $token,
'token_type' => 'bearer',
'expires_in' => $this->guard()->factory()->getTTL() * 60
]);
}

/**
* Get the guard to be used during authentication.
*
* @return \Illuminate\Contracts\Auth\Guard
*/
public function guard()
{
return Auth::guard($this->guard);
}
}

控制器中命名空间namespace需要设置好,路由的时候需要用到,
$this->middleware('refresh', ['except' => ['login','register']]);
这里的中间件使用的是网上找的,用于无痛刷新jwt的token,具体可以参考这篇文章:https://www.jianshu.com/p/9e95a5f8ac4a

6. refresh中间件

1
2
3
4
5
6
7
8
9
10
11
12
13
14
15
16
17
18
19
20
21
22
23
24
25
26
27
28
29
30
31
32
33
34
35
36
37
38
39
40
41
42
43
44
45
46
47
48
49
<?php

namespace App\Http\Middleware;

use Closure;
use Tymon\JWTAuth\Exceptions\JWTException;
use Tymon\JWTAuth\Http\Middleware\BaseMiddleware;
use Tymon\JWTAuth\Exceptions\TokenExpiredException;
use Symfony\Component\HttpKernel\Exception\UnauthorizedHttpException;

class RefreshToken extends BaseMiddleware
{
/**
* @author: zhaogx
* @param $request
* @param Closure $next
* @return \Illuminate\Http\JsonResponse|\Illuminate\Http\Response|mixed
* @throws JWTException
*/
public function handle($request, Closure $next)
{
// 检查此次请求中是否带有 token,如果没有则抛出异常。
$this->checkForToken($request);

// 使用 try 包裹,以捕捉 token 过期所抛出的 TokenExpiredException 异常
try {
// 检测用户的登录状态,如果正常则通过
if ($this->auth->parseToken()->authenticate()) {
return $next($request);
}
throw new UnauthorizedHttpException('jwt-auth', '未登录');
} catch (TokenExpiredException $exception) {
// 此处捕获到了 token 过期所抛出的 TokenExpiredException 异常,我们在这里需要做的是刷新该用户的 token 并将它添加到响应头中
try {
// 刷新用户的 token
$token = $this->auth->refresh();
// 使用一次性登录以保证此次请求的成功
\Auth::guard('api')->onceUsingId($this->auth->manager()->getPayloadFactory()->buildClaimsCollection()->toPlainArray()['sub']);
} catch (JWTException $exception) {
// 如果捕获到此异常,即代表 refresh 也过期了,用户无法刷新令牌,需要重新登录。
throw new UnauthorizedHttpException('jwt-auth', $exception->getMessage());
}
}

return $next($request)->withHeaders([
'Authorization'=> 'Bearer '.$token,
]);
}
}

写好中间件后需要在app/Http/Kernel.php中注入
protected $routeMiddleware = [
​ ……
​ ‘refresh’ => RefreshToken::class,
];

7. routes/api.php 设置路由

1
2
3
4
5
6
7
8
9
$api = app('Dingo\Api\Routing\Router');
$api->version('v1', ['namespace' => 'App\Http\Controllers\V1'], function ($api) {
$api->post('register', 'AuthController@register');
$api->post('login', 'AuthController@login');
$api->post('logout', 'AuthController@logout');
$api->post('refresh', 'AuthController@refresh');
$api->post('me', 'AuthController@me');
$api->get('test', 'AuthController@test');
});

这里有个坑,不要这样写$api->post(‘me’,[‘middleware’ =>’refresh’], ‘AuthController@me’);
这样虽然能执行这个中间件但执行到$next($request)这里会出错,貌似是一个回调报错 Function name must be a string ,不太清楚具体原因,可以这样写$api->post(‘me’,, ‘AuthController@me’)->middleware(‘refresh’);

根据以上几个步骤就可以建立起简单的api后台基础,获取api路由列表可以使用命令行:
php artisan api:routes
routes:list貌似无法显示以上api路由,需要在api.php那里再写一遍原始的laravel路由定义才可以显示:比如这样Route::post(‘api/test’, ‘AuthController@test’);后续会用另一篇幅来记录postman和小程序相关知识